In this chapter, we'll redesign our layout to include a sidebar with a chat list on the left and chat content as the main area. For now, the main content will remain empty as we focus on building the chat list functionality.
Need Help?
If you encounter any difficulties, you can always reference the complete code from this GitHub repository:
Note
Some parts of this chapter are similar to or the same as the previous Next.js module
First, we need to install some shadcn components. Run this command in your terminal:
bash
If the CLI doesn't install icons automatically, run bun add lucide-react.
This creates new components in the components/ui folder. Feel free to explore them to see how they're built.
Now we need to remove Tanstack Start example web page content. First let's move to src/routes/index.tsx and remove everything and leave just simple div component:
typescript
index.tsx is a main web page of the tanstack app.
Now let's configure the main layout. In Next.js there was a layout.tsx file that contained the layout of the whole app.
In the TanStack Start app we have it in the src/routes/__root.tsx file. When you open it you will see that it exports one property called Route which is being created by calling createRootRoute. createRootRoute has a shellComponent property that is basically an equivalent to layout.tsx in Next.js.
Let's change our RootDocument to match what we had in the Next.js app. Replace the whole content with:
src/routes/__root.tsxtypescript
You'll see an error about a missing @/components/ChatSidebar file. Let's create it!
Create a new file ChatSidebar.tsx in the src/components/ folder with the following content:
src/components/ChatSidebar.tsxtypescript
Great! Now we have the backbone of our application. In your browser, you should see something like this:

Next, we'll create the code for storing chats. First, we need to define a Chat type. Create a new folder and file at src/types/chat.ts with this content:
src/types/chat.tstypescript
Next, we'll add a simple in-memory storage with database functions. Create src/db/chat.ts with the following content:
src/db/chat.tstypescript
Contents of the file seems to be obvious - we've created two functions here:
getChats - Retrieves chats from the local chats array.createChat - Creates a new chat.Now we have database-related code, let's add some Server Functions (remember that Next.js had also server functions?). Differently from Next.js we will create a folder /src/api and will create chat.ts file in it with a content:
src/api/chat.tstypescript
The first thing you'll notice is the createServerFn method. This is similar to Next.js's use server directive but written in a more functional style with the ability to specify which HTTP method it should use.
Also, we've created two Server Functions instead of one as it was in Next.js. getChatsFn also needs to be created and we cannot use getChats directly like we could with Next.js Server Components.
Now we have all the infrastructure needed to connect it to our components. Go to src/routes/__root.tsx and add getChatsFn as follows:
src/routes/__root.tsxtypescript
As you can see, we made several changes:
loader prop to createRootRoute function. loader is an async function where we need to fetch all backend related data. That data is then passed to componentRoute.useLoaderData() located in react component which get's previously fetched data in loaderchats data to ChatSidebarRemember how it worked in Next.js?
In Chapter 2 of the Next.js module, we discussed whether it was safe to call database functions directly in components.
Here in TanStack Start, we need to create and call a Server Function that is explicitly passed to a component. This brings us to the most important thing to understand about TanStack Start:
All code in TanStack Start is isomorphic by default - meaning that all of the code you write here runs on both the client and the server. There's no automatic magic like in Next.js Server Components. You must be explicit about what runs where. If you want to learn more look at Tanstack Router documentation.
Now let's update ChatSidebar.tsx to display the chats:
/src/components/ChatSidebar.tsxtypescript
What we've done here is iterate over the received chats and create an item for each one. If there are no chats, we display a "no chats" message.
You should see something like this:

Now let's add the ability to create new chats! We will create a section at the start of the <SidebarContent> component with an add button and will make use of server functions to add new chats:
/src/components/ChatSidebar.tsxtypescript
Let's review what we did here:
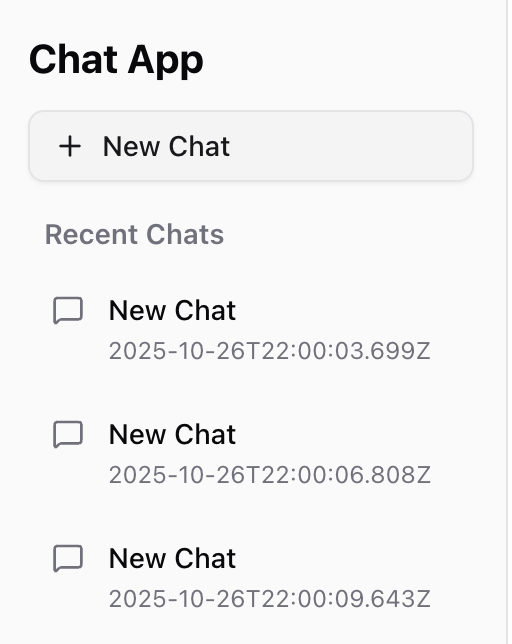
Add Chat section with a button that calls the submitChat functionsubmitChat function calls the addChatFn Server Function and then invalidates the page, which causes the loader function to be called again and the data to be refreshedNow you can test it! Click the New Chat button in your browser. After a few clicks, you should see a similar view:
Now we can create and view chats, but there are some problems with our current approach:
Chats are not persistent after page refresh
Why does this happen? The issue is that we're storing chats in an in-memory array that lives only for the lifetime of the server process. In development, the server may restart, and in production deployments (especially serverless environments like Vercel, Cloudflare Workers, or Netlify), each function invocation may get a fresh instance with a new empty chats array. This means our data disappears on every refresh or deployment.
TanStack Start can run in both traditional Node.js servers and serverless environments, but in-memory storage is ephemeral in both cases. We need persistent storage.
We need a better approach for this. Normally you would use a database or cloud storage, but for this course we'll store data locally as a file. This will persist through refreshes and across server function calls.
Let's get started! First, we need to create utilities for file storage. Create src/lib/fileUtils.ts with the following content:
src/lib/fileUtils.tstypescript
This utility provides two functions:
readContent - Reads and parses JSON data from a file, creating the directory if it doesn't existwriteContent - Writes data to a file as formatted JSONNext, we need to update our src/db/chat.ts functions to use these utilities:
src/db/chat.tstypescript
Key changes we made:
chats arraygetChats() now reads from the chats.json filecreateChat() reads existing chats, adds the new chat, and writes back to the fileNow when you add chats and refresh the page, they should persist. Great work!
Great! We now have our first working feature. Users can create and view chat objects. Remember, this isn't just frontend code - we already have a backend with React components, server functions, and persistent storage!
Mark this chapter as finished to continue
Mark this chapter as finished to continue